Chapter 5.1 - Set up Label Studio
Introduction
In the previous chapters, we successfully deployed and accessed our model on Kubernetes, set up continuous deployment with a CI/CD pipeline, and trained the model on a Kubernetes pod. Now, we will focus on labeling new data to further improve our model's performance.
The quality of data is crucial for any machine learning model. The saying "garbage in, garbage out" holds true: if the data fed into the model is of poor quality, the predictions of the model will also be poor. Therefore, giving careful attention to the data labeling process is essential to guarantee high-quality, accurate data.
In Supervised Learning tasks, collecting and labeling data is usually not a one-time task but an iterative process. Just as developing a machine learning model involves multiple iterations of training and parameter adjustments, the data collection and labeling process also requires continuous refinement. As new data becomes available and the requirements of the model evolve, additional rounds of data labeling and quality checks are necessary to maintain and improve the model's performance.
Label Studio is an open-source data labeling tool that supports various data types, including text, images, audio, and video. In this chapter, we will guide you through setting up Label Studio in your environment. This includes installing the necessary dependencies, configuring the tool, and preparing it for data labeling tasks.
In this chapter, you will learn how to:
- Set up Label Studio to have a fully functional instance ready to label new data
- Import supplemental data for labeling
The new data will be used in subsequent chapters to retrain and improve your model.
The following diagram illustrates the control flow of the experiment at the end of this chapter:
flowchart TB
    extra -->|upload| labelStudioTasks

    subgraph workspaceGraph[WORKSPACE]
        extra[extra-data/extra]
    end

    subgraph labelStudioGraph[LABEL STUDIO]
        labelStudioTasks[Tasks]
endSteps
Download the Data
Before configuring Label Studio, you will need the additional data used for
labeling. This is the same extra-data archive you downloaded in
Chapter 4.2 - Detect drift locally with Evidently AI
to generate inference logs.
If you do not have the folder yet, download the archive:
# Download the archive containing the extra data
curl -L -o extra-data.zip https://github.com/swiss-ai-center/a-guide-to-mlops/archive/refs/heads/extra-data.zip
The downloaded archive must be decompressed and renamed:
# Extract the dataset
unzip extra-data.zip

# Rename the extracted folder to `extra-data`
mv a-guide-to-mlops-extra-data/ extra-data/

# Remove the archive
rm extra-data.zip
The folder also contains its own .gitignore, so its content is ignored
automatically.
Install Label Studio
Next, we will install Label Studio in our environment. Add the main
label-studio dependency to the requirements.txt file:
tensorflow==2.21.0
matplotlib==3.11.0
scikit-learn==1.9.0
pyyaml==6.0.3
dvc[gs]==3.67.1
bentoml==1.4.39
pillow==12.3.0
evidently==0.7.23
label-studio==1.23.0
Check the differences with Git to validate the changes:
# Show the differences with Git
git diff requirements.txt
The output should be similar to this:
diff --git a/requirements.txt b/requirements.txt
index 6501b50..e5f490c 100644
--- a/requirements.txt
+++ b/requirements.txt
@@ -6,3 +6,4 @@ dvc[gs]==3.67.1
 bentoml==1.4.39
 pillow==12.3.0
 evidently==0.7.23
+label-studio==1.23.0
Install the package and update the freeze file.
Warning
Prior to running any pip commands, it is crucial to ensure the virtual environment is activated to avoid potential conflicts with system-wide Python packages.
To check its status, simply run which python. If the virtual environment is
active, the output will show the path to the virtual environment's Python
executable. If it is not, you can activate it with source .venv/bin/activate.
Check the changes
Check the changes with Git to ensure that all the necessary files are tracked:
# Add all the files
git add .

# Check the changes
git status
The output should look like this:
On branch main
Changes to be committed:
  (use "git restore --staged <file>..." to unstage)
        modified:   requirements-freeze.txt
        modified:   requirements.txt
Commit the changes to Git
Commit the changes to Git:
Start Label Studio
You can now start Label Studio with the following command:
macOS: raise the open-file limit
Importing 1,000 images can exceed macOS's open-file limit. Raise it in the same terminal before starting Label Studio:
# Start Label Studio
DATA_UPLOAD_MAX_NUMBER_FILES=1000 label-studio
Info
This raises Label Studio's per-upload file limit so you can import all the
extra-data/extra images at once. The default limit (100 files) is lower than
the number of images in this chapter, which would force you to upload them in
multiple batches.
Label Studio will start on http://localhost:8080. Open the URL in your browser and sign up for an account.
Note
The account creation is completely offline and local. It is not related to any service or enterprise offer from Label Studio. This is only done once to create an ID locally.
Create a New Project
Once you have signed up, you can create a new project in Label Studio:
- Click Create Project to create a project.
-
Give your project a name (ex:
MLOps Guide).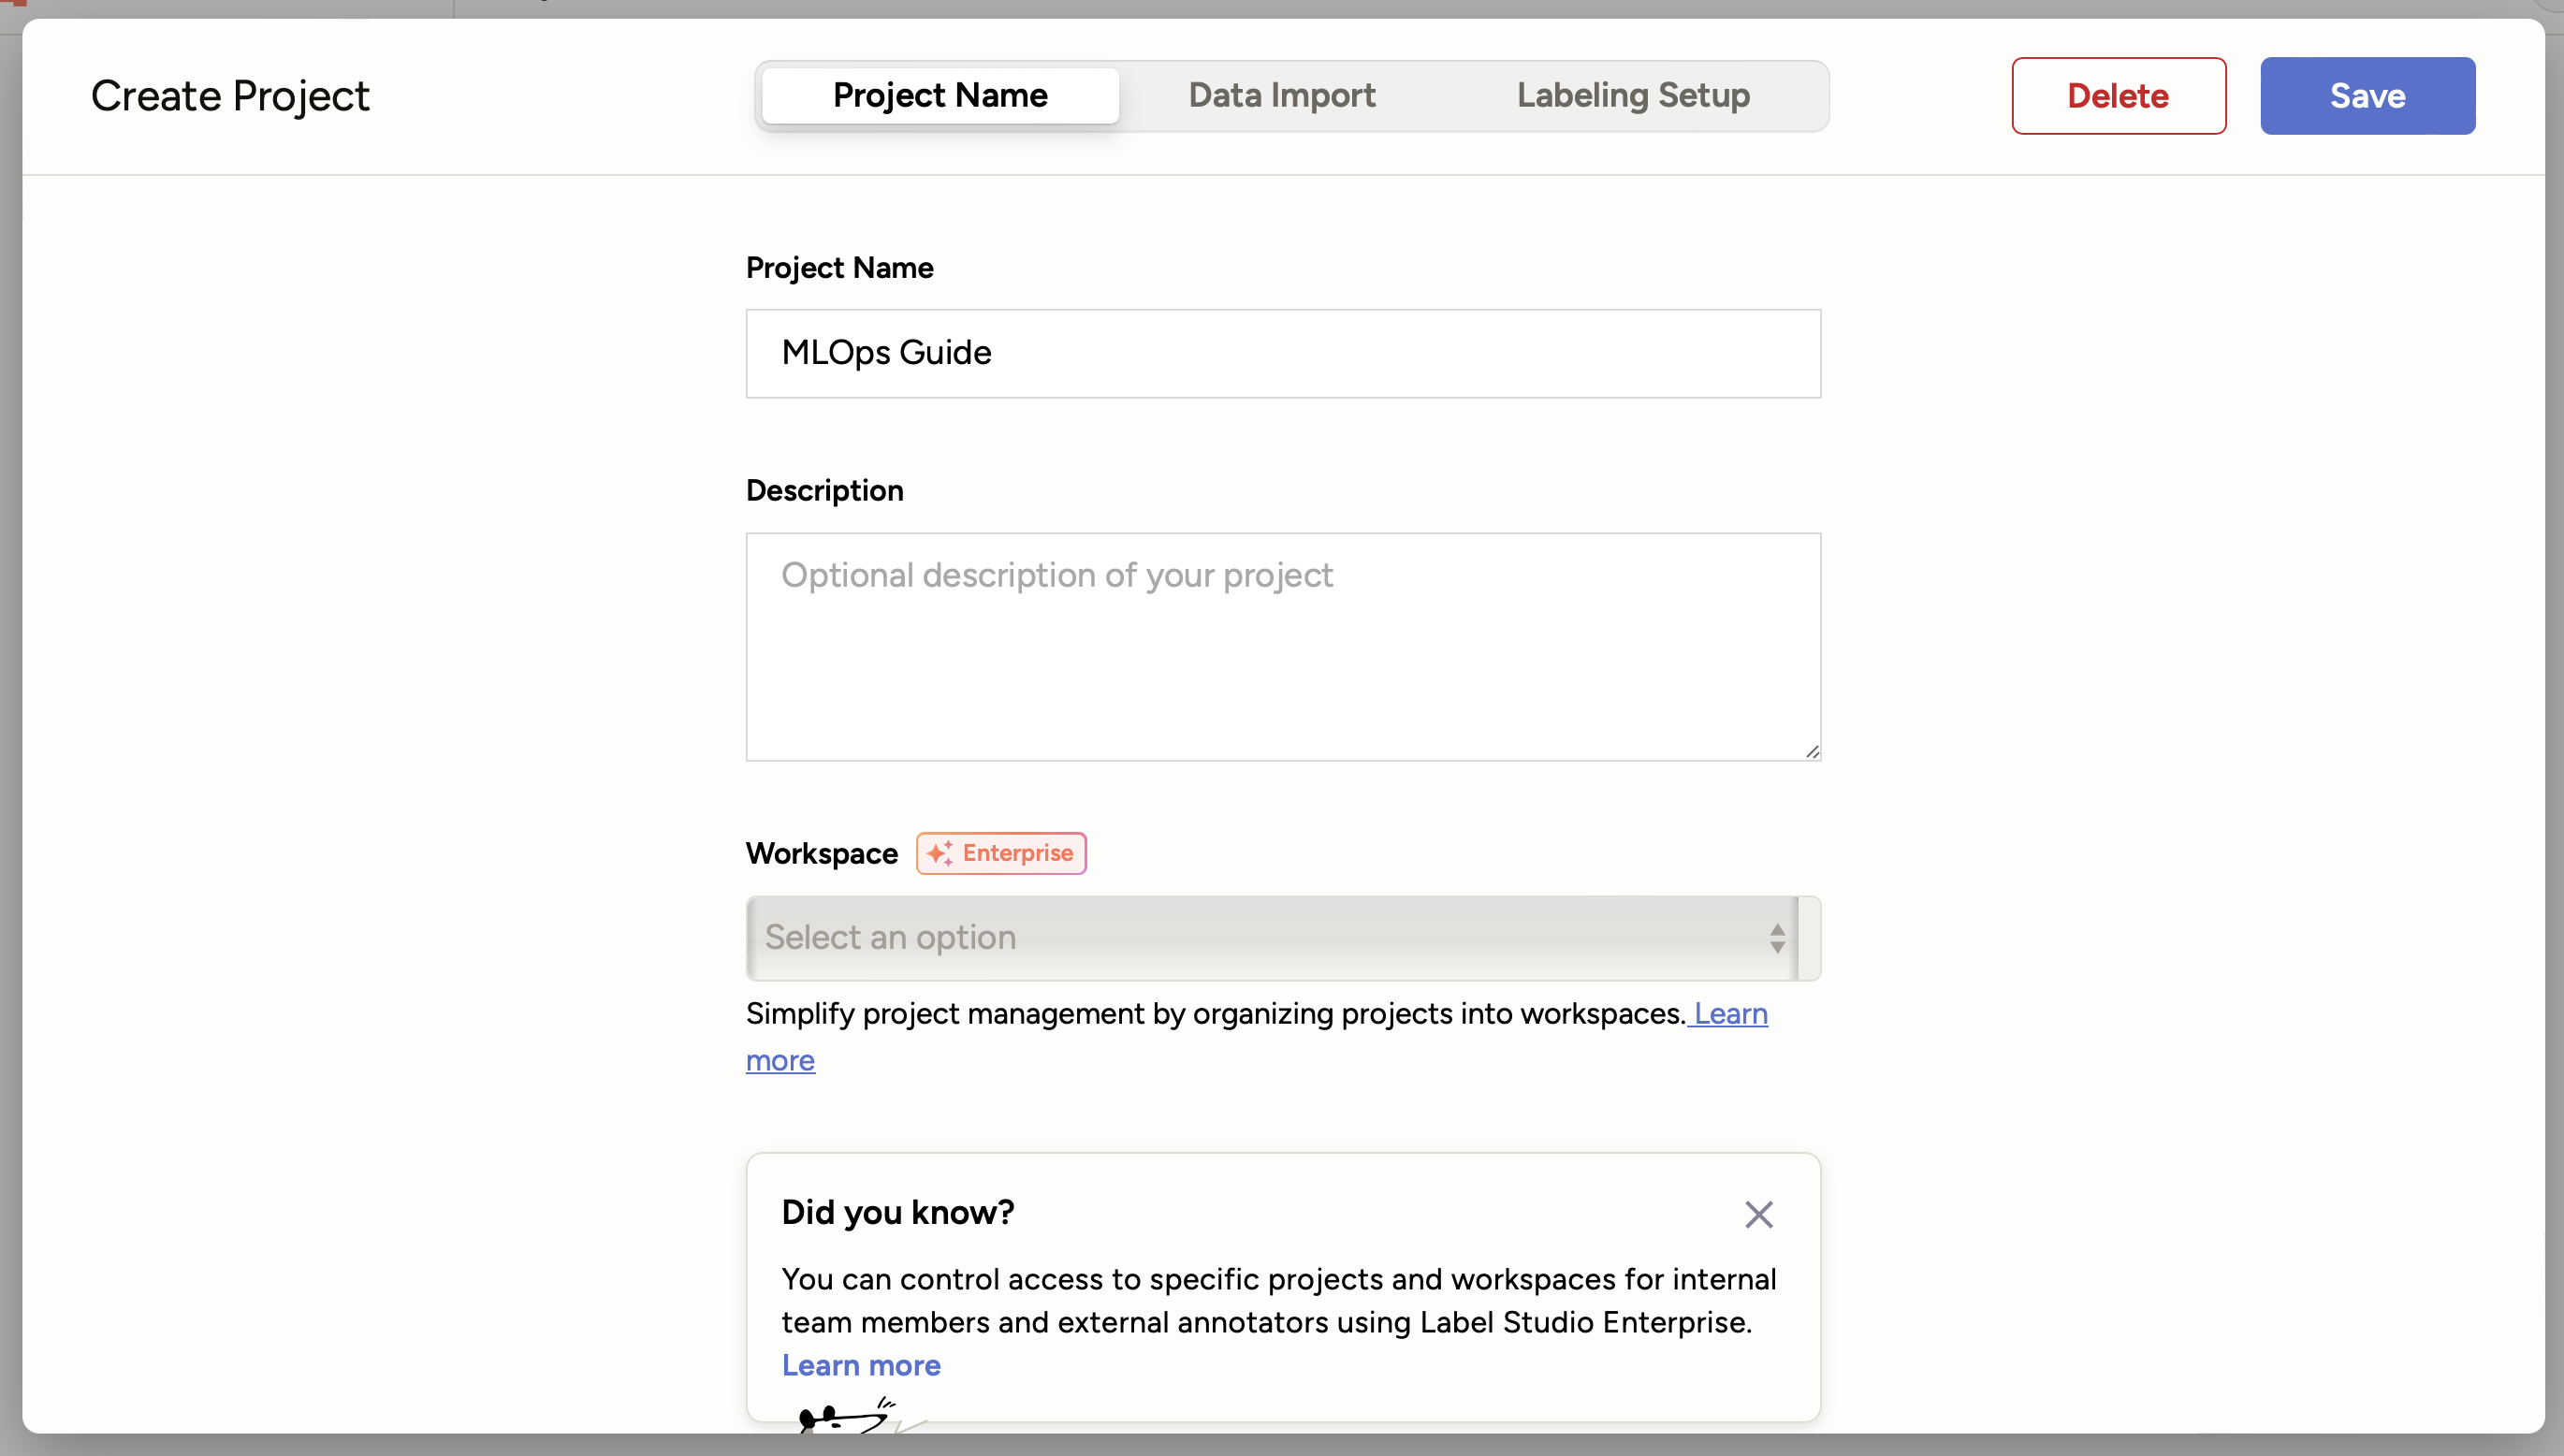
-
Select the Data Import tab and click on the Upload Files button. Select all the images from the
extra-data/extrafolder you downloaded earlier.Tip for WSL2 users
The Linux distribution is accessible through the
\\wsl.localhost\address in the file explorer. The current directory can also be opened directly from the shell with theexplorer.exe .command.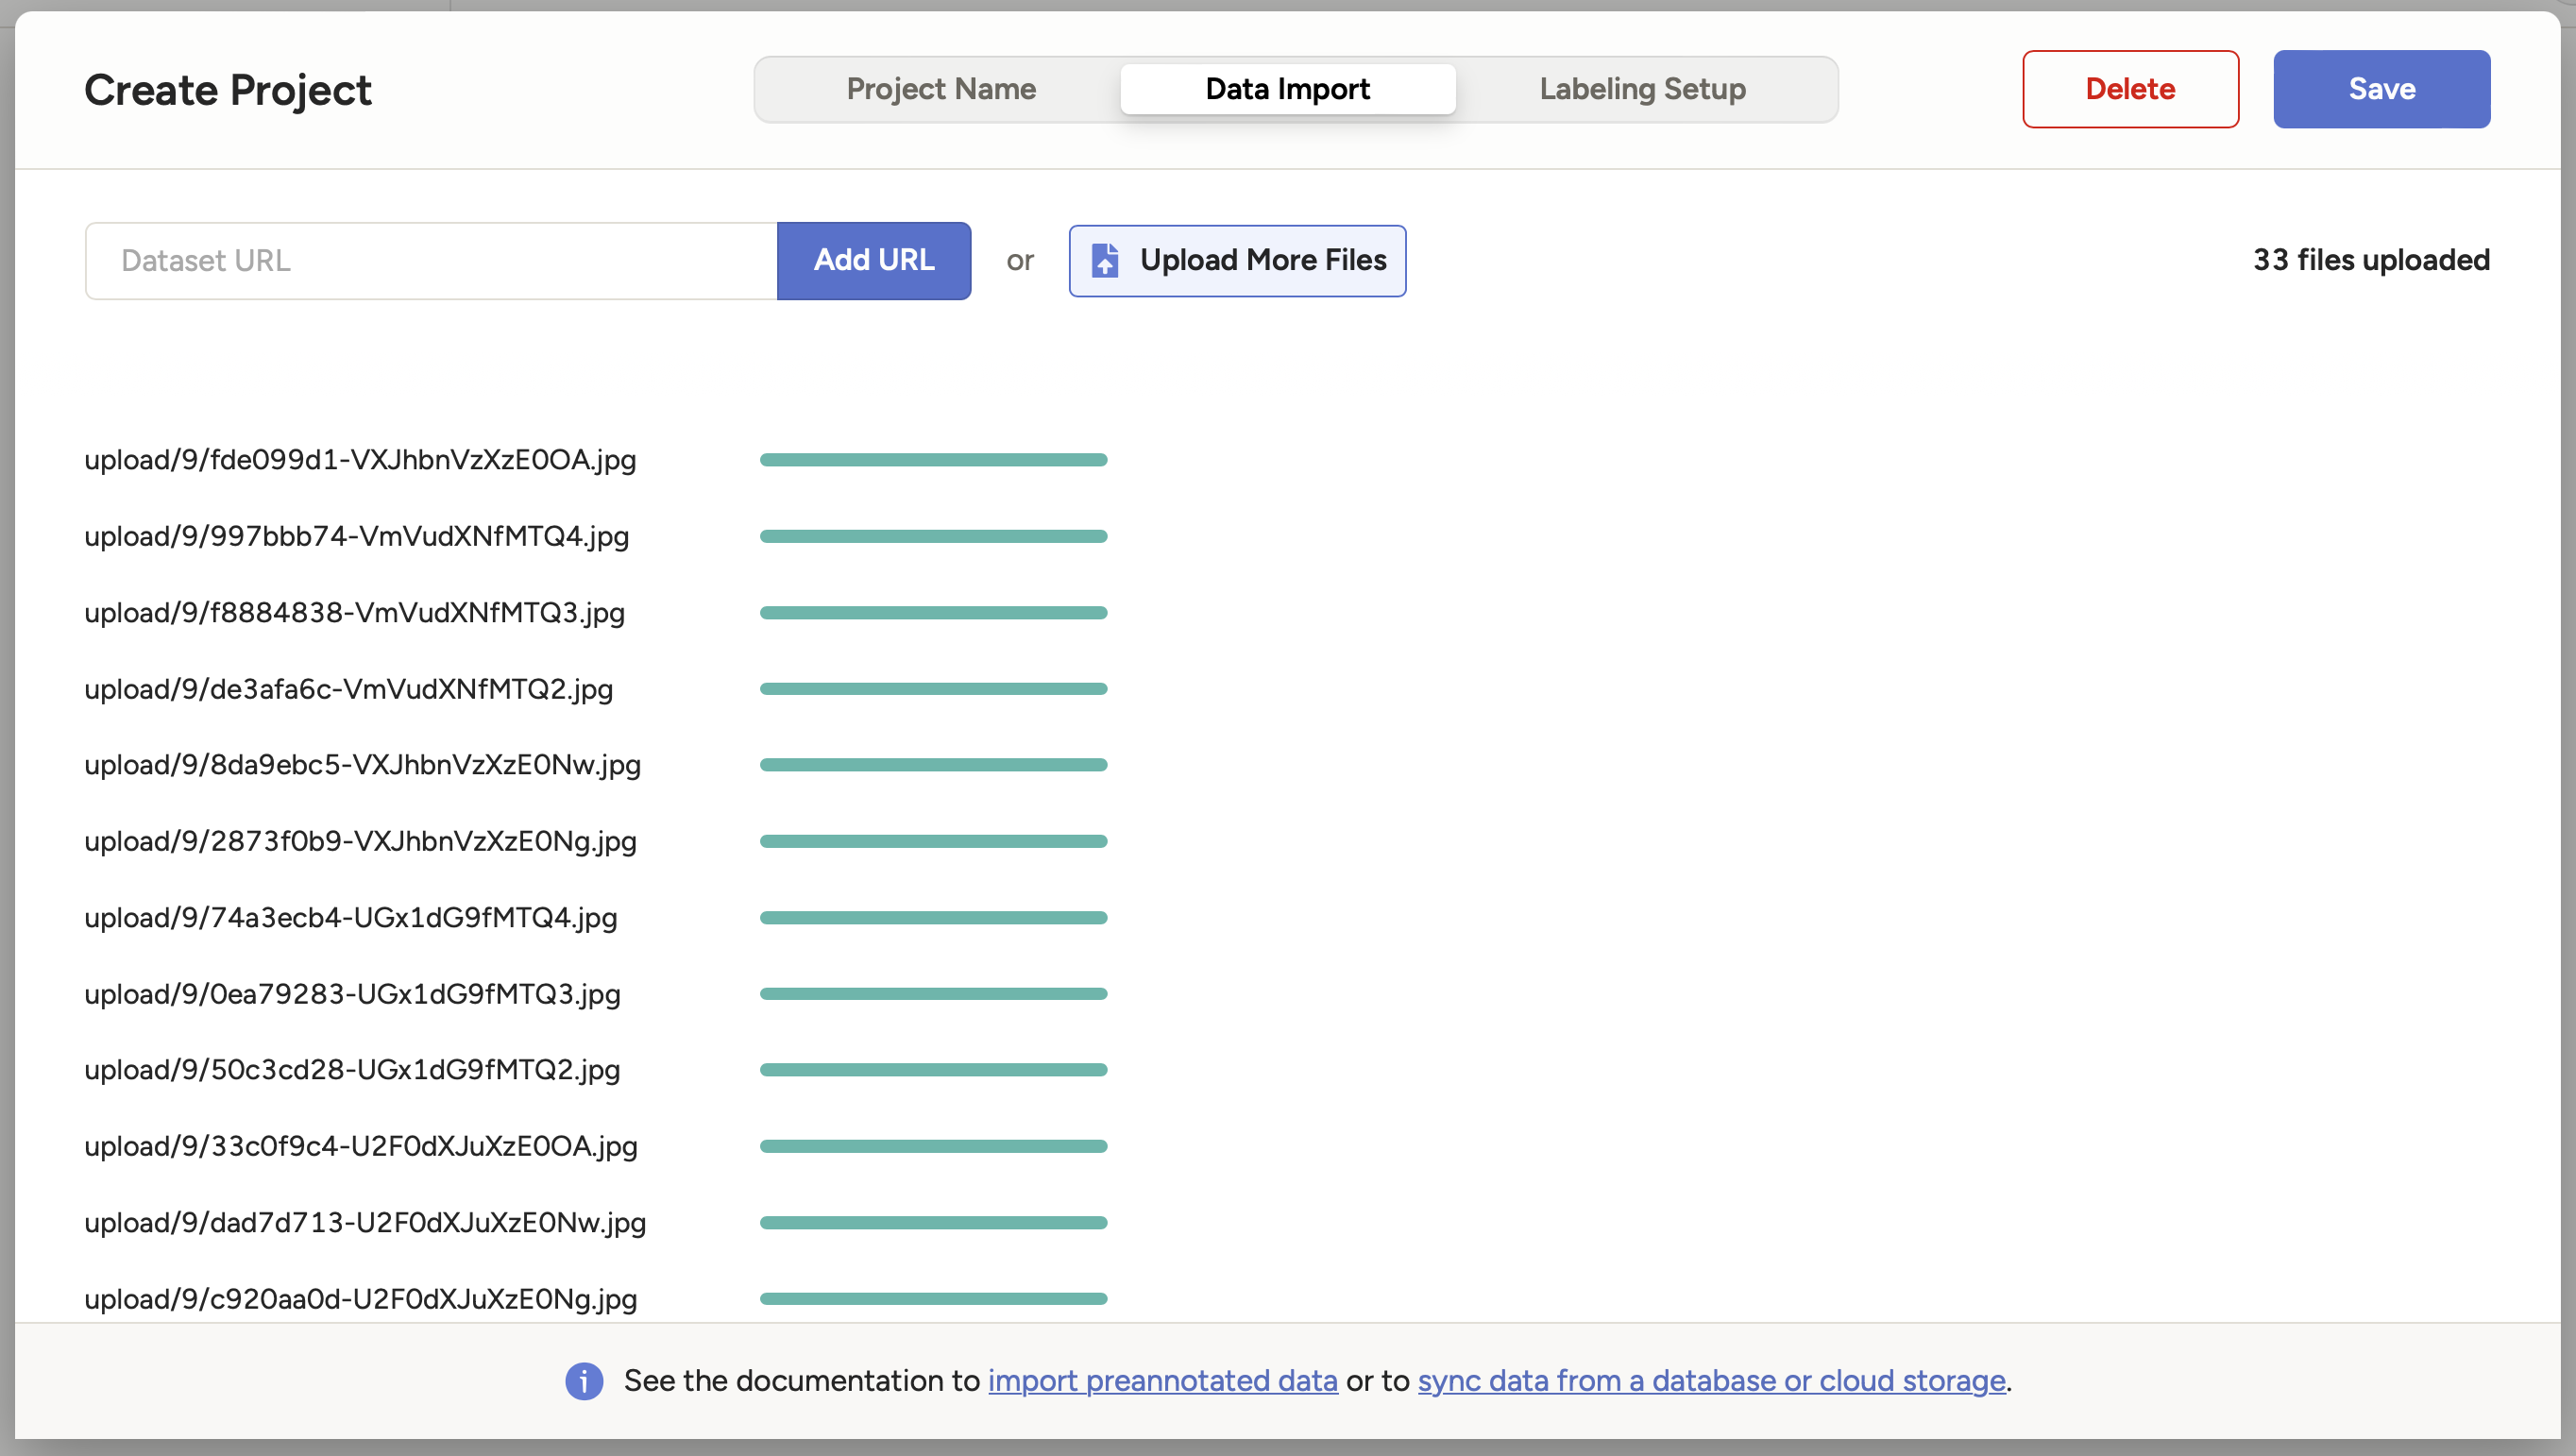
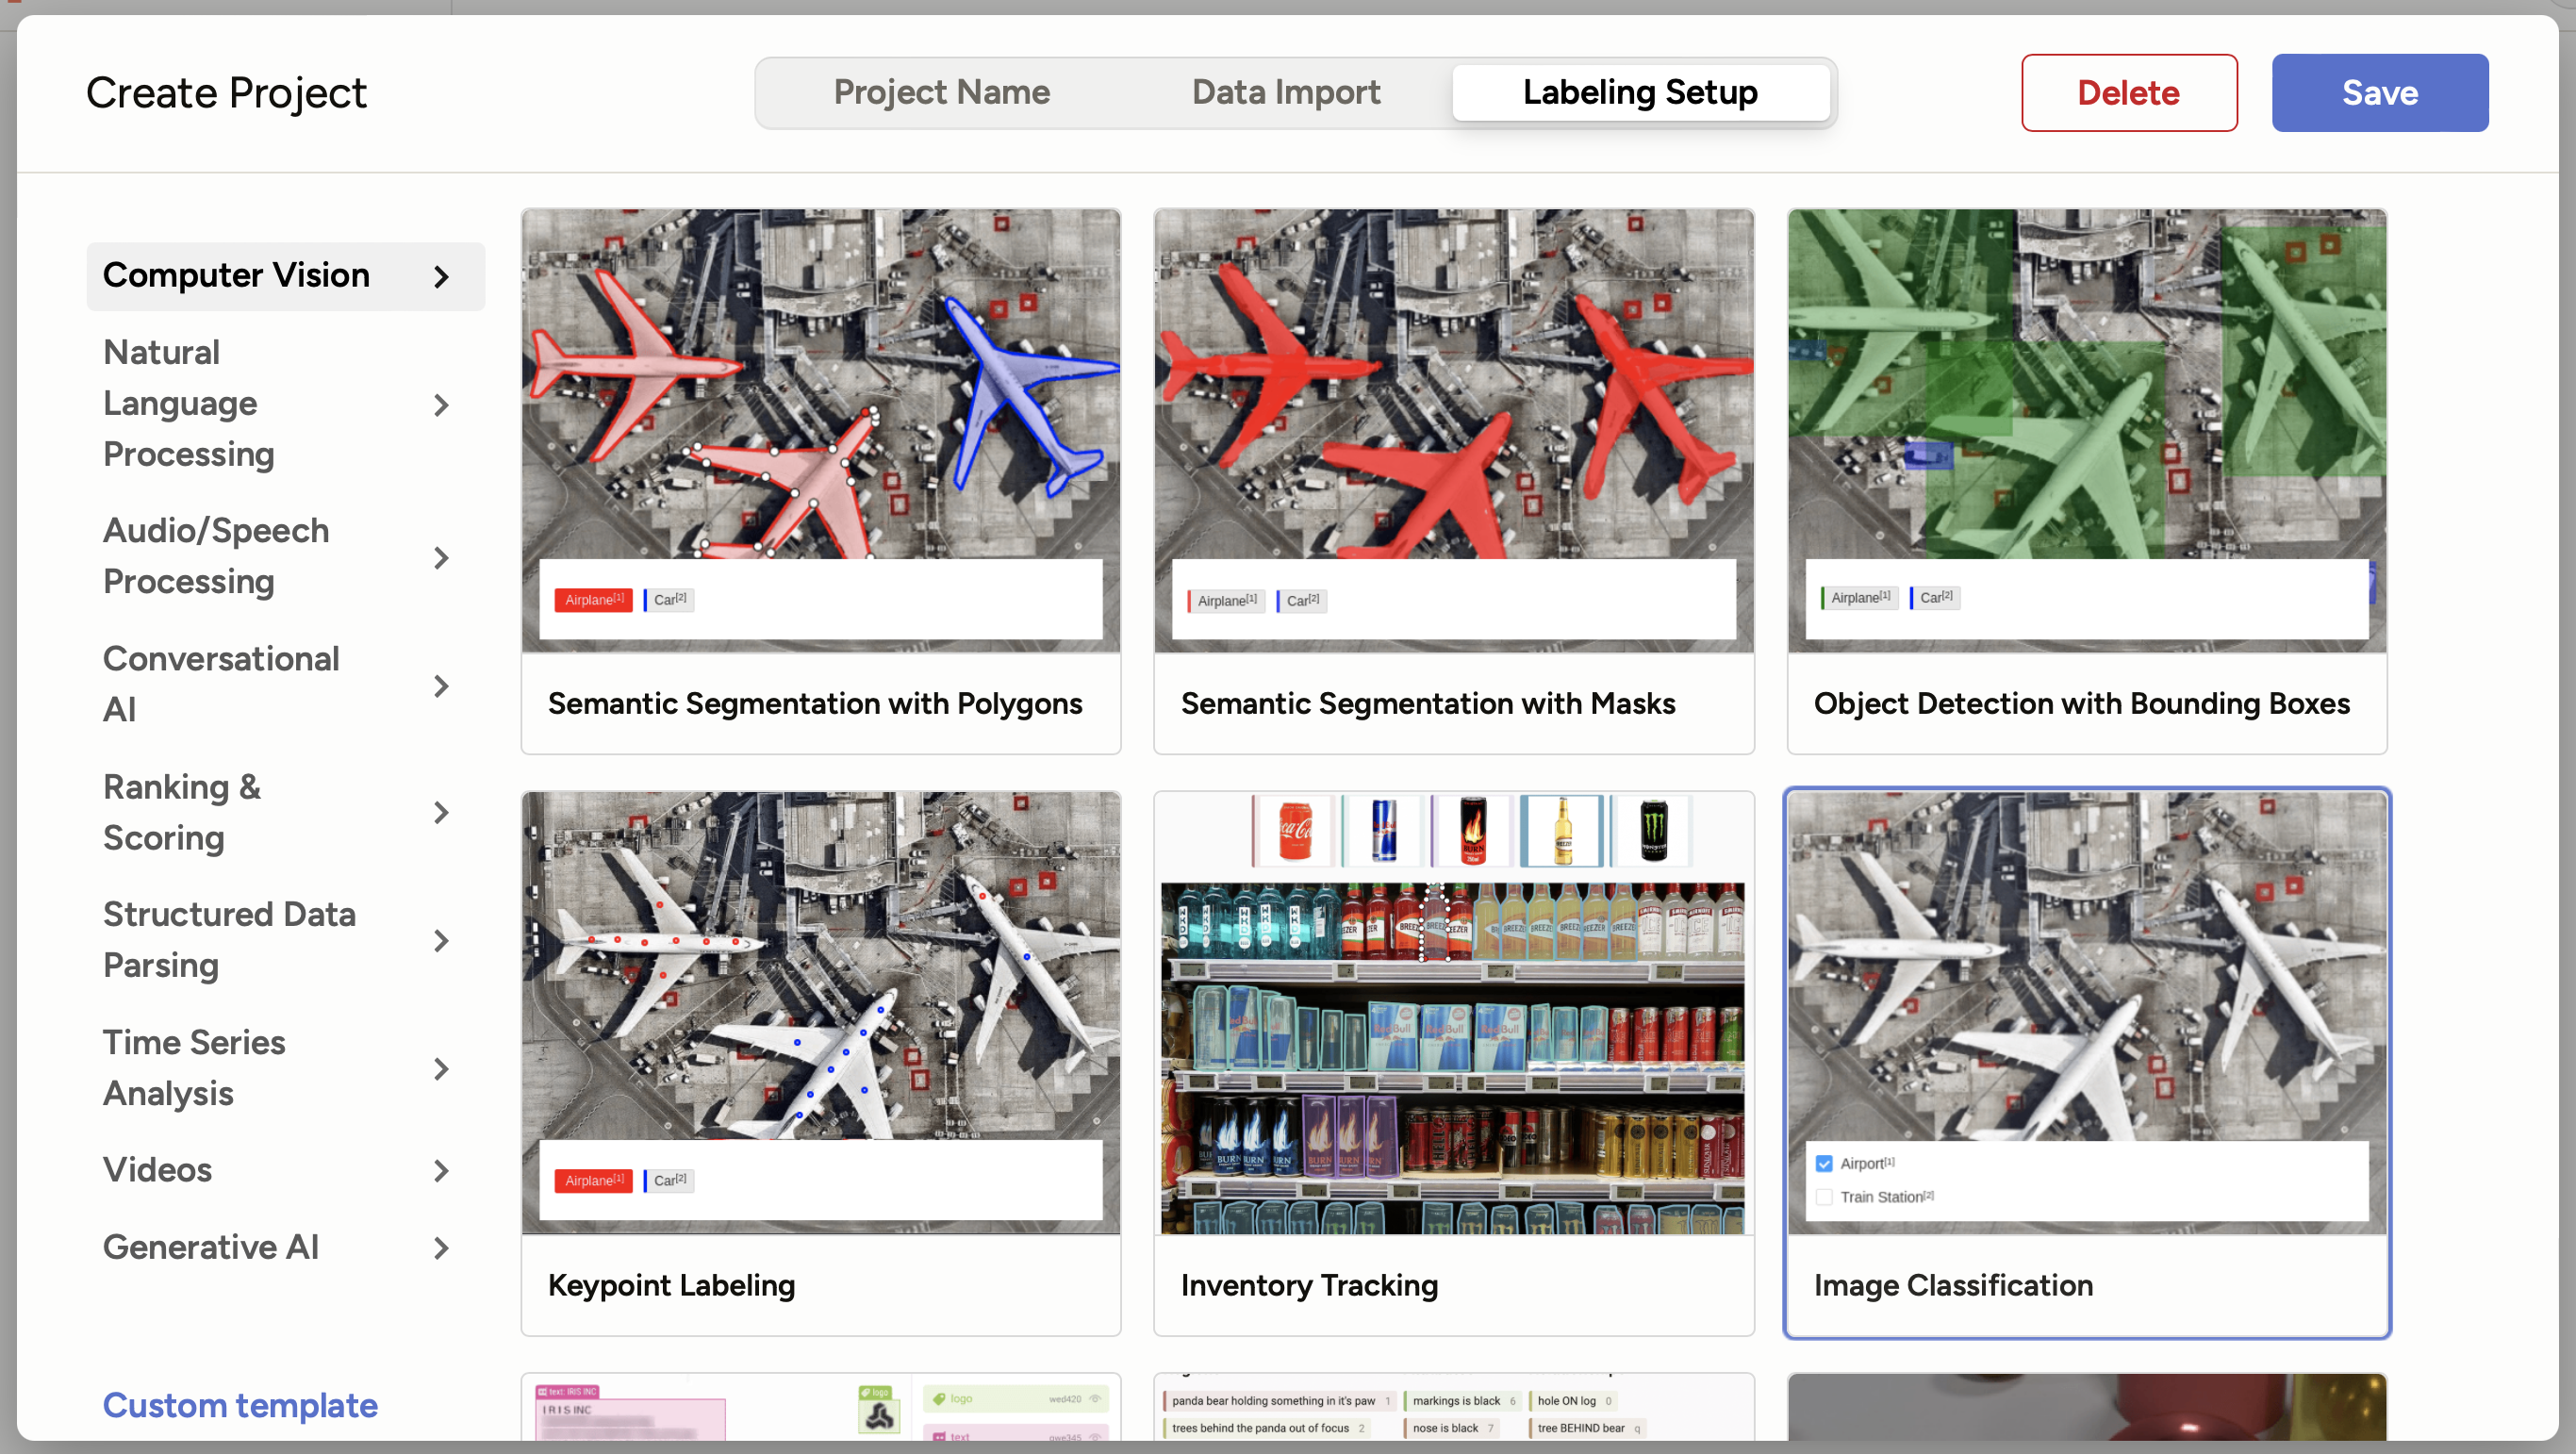
-
Select the Labeling Setup tab and choose Image Classification under the Computer Vision menu.
-
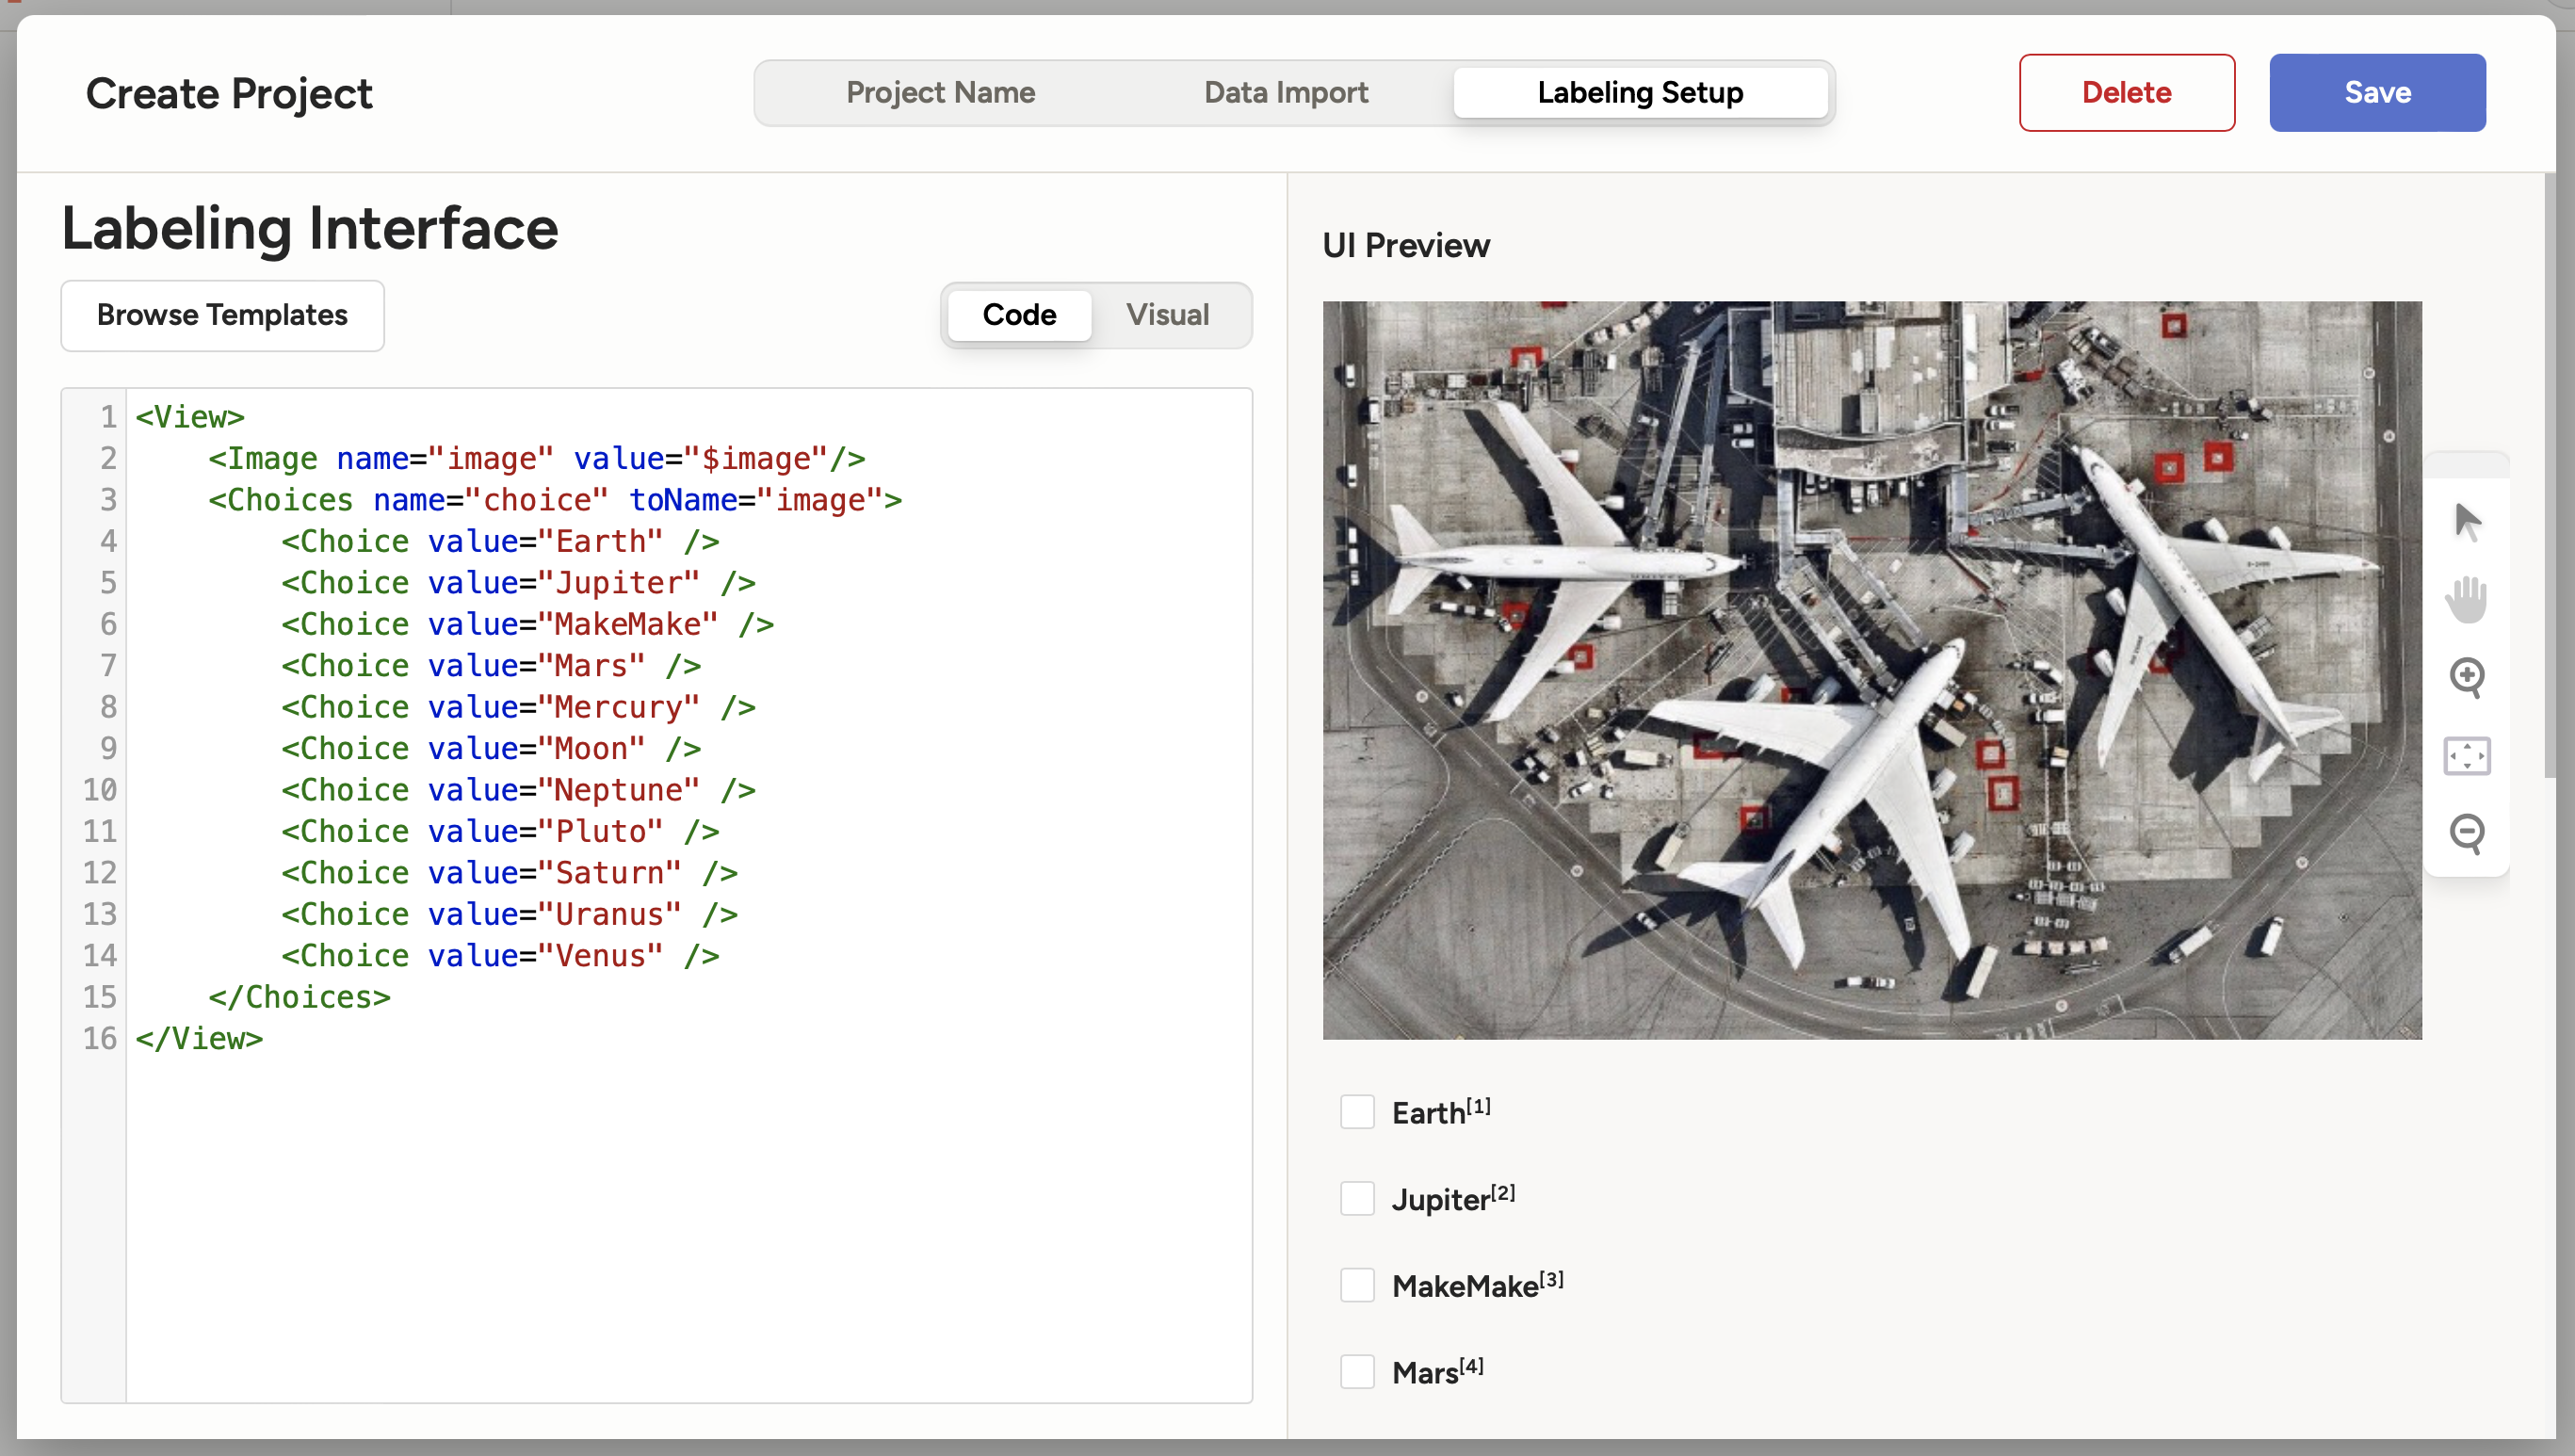
Under Labeling Interface select Code and paste the following configuration:
<View>
    <Image name="image" value="$image"/>
    <Choices name="choice" toName="image">
        <Choice value="Earth" />
        <Choice value="Jupiter" />
        <Choice value="Mars" />
        <Choice value="Mercury" />
        <Choice value="Moon" />
        <Choice value="Neptune" />
        <Choice value="Pluto" />
        <Choice value="Saturn" />
        <Choice value="Uranus" />
        <Choice value="Venus" />
    </Choices>
</View>
Here we simply define the choices for the image classification task.
Info
You can read more about the Label Studio configuration in the official documentation.
The configuration should look like this:
-
Click Save to create the project.
Summary
Congratulations! You have successfully set up Label Studio in your environment and imported new data. You are now ready to start labeling your data!
Take away
- Data labeling is an iterative process, not a one-time task: Just as model training involves multiple rounds of adjustments, data collection and labeling requires continuous refinement as new data becomes available and model requirements evolve, making it essential to establish systematic labeling workflows from the start.
- Label Studio provides structure to an otherwise chaotic process: Open-source labeling tools like Label Studio transform manual annotation from ad-hoc spreadsheets or file naming conventions into organized projects with proper task tracking, annotation history, and quality control mechanisms.
- Configuration-as-code enables reproducibility: Defining labeling interfaces through XML templates (rather than clicking through UI settings) ensures the labeling schema is documented, version-controlled, and can be easily replicated across projects or shared with team members.
- Local-first development reduces barriers to experimentation: Running Label Studio locally without requiring cloud accounts or enterprise licenses allows you to prototype labeling workflows quickly and iterate on the annotation schema before scaling to production.
State of the MLOps process
- Labeling of supplemental data is not systematic or uniform
- Labeling of supplemental data is time intensive
- Model needs to be retrained using higher-quality data
Continue to the next chapters to address the remaining items.