Chapter 1.1 - Run a simple ML experiment with Jupyter Notebook
Introduction
As a recent addition to the ML team, your objective is to contribute to the development of a model capable of visually identifying planets or moons within our solar system from images.
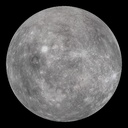
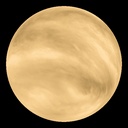
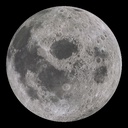
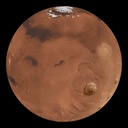
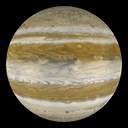
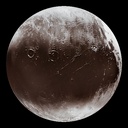
The data scientists of your team have been actively collaborating on a Jupyter Notebook, which they have readily shared with you. The dataset they have gathered comprises approximately 1,500 images capturing 10 distinct planets and moons. Each celestial body is represented by around 150 images, each taken from a unique angle.
| Mercury | Venus | Earth | Moon | Mars |
|---|---|---|---|---|
 |
 |
 |
 |
 |
| Jupiter | Saturn | Uranus | Neptune | Pluto |
|---|---|---|---|---|
 |
 |
 |
 |
 |
The training process is as follows:
- Preprocess the dataset
- Split the dataset into training and validation sets
- Train a model to classify the celestial bodies images using the training set
- Evaluate the model's performance using metrics, training history, predictions preview and a confusion matrix.
Your primary objective is to enhance the team's workflow by implementing MLOps tools, documenting the procedures, tracking changes, and ensuring the model is accessible to others.
In this chapter, you will learn how to:
- Set up the project directory
- Acquire the notebook
- Obtain the dataset
- Create a Python environment to run the experiment
- Launch the experiment locally for the first time
The following diagram illustrates the control flow of the experiment at the end of this chapter:
flowchart
    subgraph workspaceGraph[WORKSPACE]
        data[data/raw] <--> notebook[notebook.ipynb]
    end
Let's get started!
Steps
Set up the project directory
As a new team member, set up a project directory on your computer for this ground breaking ML experiment. This directory will serve as your working directory for this first chapter:
# Create the working directory
mkdir mlops-guide-notebook

# Switch to the working directory
cd mlops-guide-notebook
Download the notebook
Your colleague provided you the following URL to download an archive containing the Jupyter Notebook for this machine learning experiment:
# Download the archive containing the Jupyter Notebook
curl -L -o notebook.zip https://github.com/swiss-ai-center/a-guide-to-mlops/archive/refs/heads/notebook.zip
Unzip the Jupyter Notebook into your working directory:
# Extract the Jupyter Notebook
unzip notebook.zip

# Move the subdirectory files to the working directory
mv a-guide-to-mlops-notebook/* .

# Remove the archive and the directory
rm -r notebook.zip a-guide-to-mlops-notebook
Download and set up the dataset
Your colleague provided you the following URL to download an archive containing the dataset for this machine learning experiment:
# Download the archive containing the dataset
curl -L -o data.zip https://github.com/swiss-ai-center/a-guide-to-mlops/archive/refs/heads/data.zip
This archive must be decompressed and its contents be moved in the data
directory in the working directory of the experiment:
# Extract the dataset
unzip data.zip

# Move the `data.xml` file to the working directory
mv a-guide-to-mlops-data/ data/

# Remove the archive and the directory
rm data.zip
Explore the notebook and dataset
Examine the notebook and the dataset to get a better understanding of their contents.
Your working directory should now look like this:
.
├── data # (1)!
│   ├── raw # (2)!
│   │   └── ...
│   └── README.md
├── README.md
├── notebook.ipynb
└── requirements.txt
- This, and all its sub-directories, is new.
- The
rawdirectory includes the unprocessed dataset images.
Create the virtual environment
Create the virtual environment and install necessary dependencies in your working directory:
Not familiar with virtual environments? Read this!
What are virtual environments?
Python virtual environments are essential tools for managing dependencies and isolating project environments. They allow developers to create separate, self-contained environments for different projects, ensuring that each project has its own set of dependencies without interfering with one another.
This is particularly important when working on multiple projects with different versions of libraries or packages.
How do virtual environments work?
Virtual environments work by creating a local directory that contains a Python interpreter and a copy of the desired Python packages. When activated, the virtual environment modifies the system's PATH variable to prioritize the interpreter and packages within the local directory.
This ensures that when running Python commands, the system uses the specific interpreter and packages from the virtual environment, effectively isolating the project from the global Python installation for clean project separation and by extension stability and reproducibility.
Run the experiment
Awesome! You now have everything you need to run the experiment: the notebook and the dataset are in place, the virtual environment is ready; and you're ready to run the experiment for the first time.
Launch the notebook:
A browser window should open with the Jupyter Notebook at http://localhost:8888/lab/.
You may notice all the previous outputs from the notebook might still be present. This is because the notebook was not cleared before being shared with you. This can be useful to see the results of previous runs.
In most cases, however, it can also be a source of confusion. This is one of the limitations of the Jupyter Notebook, which make them not always easy to share with others.
For the time being, execute each step of the notebook to train the model and evaluate its performance. Previous outputs will be overwritten.
Ensure the experiment runs without errors. Once done, you can close the browser window. Shut down the Jupyter server by pressing Ctrl+C in the terminal, followed with Y and Enter.
Exit the virtual environment with the following command:
The Jupyter notebook is a valuable tool for consolidating an entire experiment into a single file, facilitating data visualization, and enabling the presentation of results. However, it also has severe limitations: it is challenging to share with others because it lacks versioning, it can be difficult to reproduce the experiment, and stale outputs or hidden state can mislead readers.
Summary
Congratulations! You have successfully reproduced the experiment on your machine.
In this chapter, you have:
- Created the working directory
- Acquired the codebase
- Obtained the dataset
- Set up a Python environment to run the experiment
- Executed the experiment locally for the first time
After running the notebook, you may have noticed that it requires manual downloads and that these steps are not documented. The next chapters address these issues.
Take away
- Jupyter Notebooks are great for exploration but limited for production: While notebooks combine code, visualization, and documentation in one place, they lack proper versioning, can be difficult to share cleanly, and stale outputs or hidden state can mislead readers.
- Manual setup processes don't scale: Downloading datasets and notebooks manually, along with undocumented setup steps, creates barriers to collaboration and reproducibility.
- Environment setup is foundational: Creating isolated Python virtual environments ensures dependencies are managed properly and experiments can be reproduced consistently.
- Understanding your experiment structure is the first step: Before optimizing workflows, you need to understand the complete flow: data preparation, model training, and evaluation.
State of the MLOps process
The notebook runs, but the workflow still relies on manual steps and undocumented assumptions. These are signs of a broader set of issues you will address in this part:
- Notebook can be run but is not adequate for production
- Codebase and dataset are not versioned
- Model steps rely on verbal communication and may be undocumented
- Changes to model are not easily visualized
The next chapters will turn the notebook into a reproducible, versioned machine learning pipeline.
Sources
Highly inspired by:
- Planets and Moons Dataset - AI in Space - kaggle.com community prediction competition.