Chapter 4.4 - Retrain the model from new data with DVC
Introduction
In this chapter, we will retrain the model using the new data we labeled in the previous chapter. We will download the annotations from Label Studio and use them to retrain the model. We will then evaluate the new model to see if it has improved.
The following diagram illustrates the control flow of the experiment at the end of this chapter:
flowchart TB
    extra_data -->|upload| labelStudioTasks
    labelStudioTasks -->|label| labelStudioAnnotations
    bento_model -->|load| fastapi
    labelStudioTasks -->|POST /predict| fastapi
    fastapi --> labelStudioPredictions
    labelStudioPredictions -->|submit| labelStudioAnnotations
    labelStudioAnnotations -->|download| extra_data_annotations
    extra_data_annotations --> |load| parse_annotations
    parse_annotations -->|copy| data_raw
    data_raw -->|dvc repro| bento_model

    subgraph workspaceGraph[WORKSPACE]
        extra_data[extra-data/extra_data]
        extra_data_annotations[extra-data/extra_data/annotations.json]
        bento_model[model/classifier.bentomodel]
        fastapi[src/serve_label_studio.py]
        parse_annotations[scripts/parse_annotations.py]
        data_raw[data/raw]
    end

    subgraph labelStudioGraph[LABEL STUDIO]
        labelStudioTasks[Tasks]
        labelStudioAnnotations[Annotations]
        labelStudioPredictions[Predictions]
    end

    style extra_data opacity:0.4,color:#7f7f7f80
    style labelStudioTasks opacity:0.4,color:#7f7f7f80
    style fastapi opacity:0.4,color:#7f7f7f80
    style labelStudioPredictions opacity:0.4,color:#7f7f7f80
    linkStyle 0 opacity:0.4,color:#7f7f7f80
    linkStyle 1 opacity:0.4,color:#7f7f7f80
    linkStyle 2 opacity:0.4,color:#7f7f7f80
    linkStyle 3 opacity:0.4,color:#7f7f7f80
    linkStyle 4 opacity:0.4,color:#7f7f7f80
    linkStyle 5 opacity:0.4,color:#7f7f7f80
Steps
Download the annotations
Make sure Label Studio is running at http://localhost:8080.
-
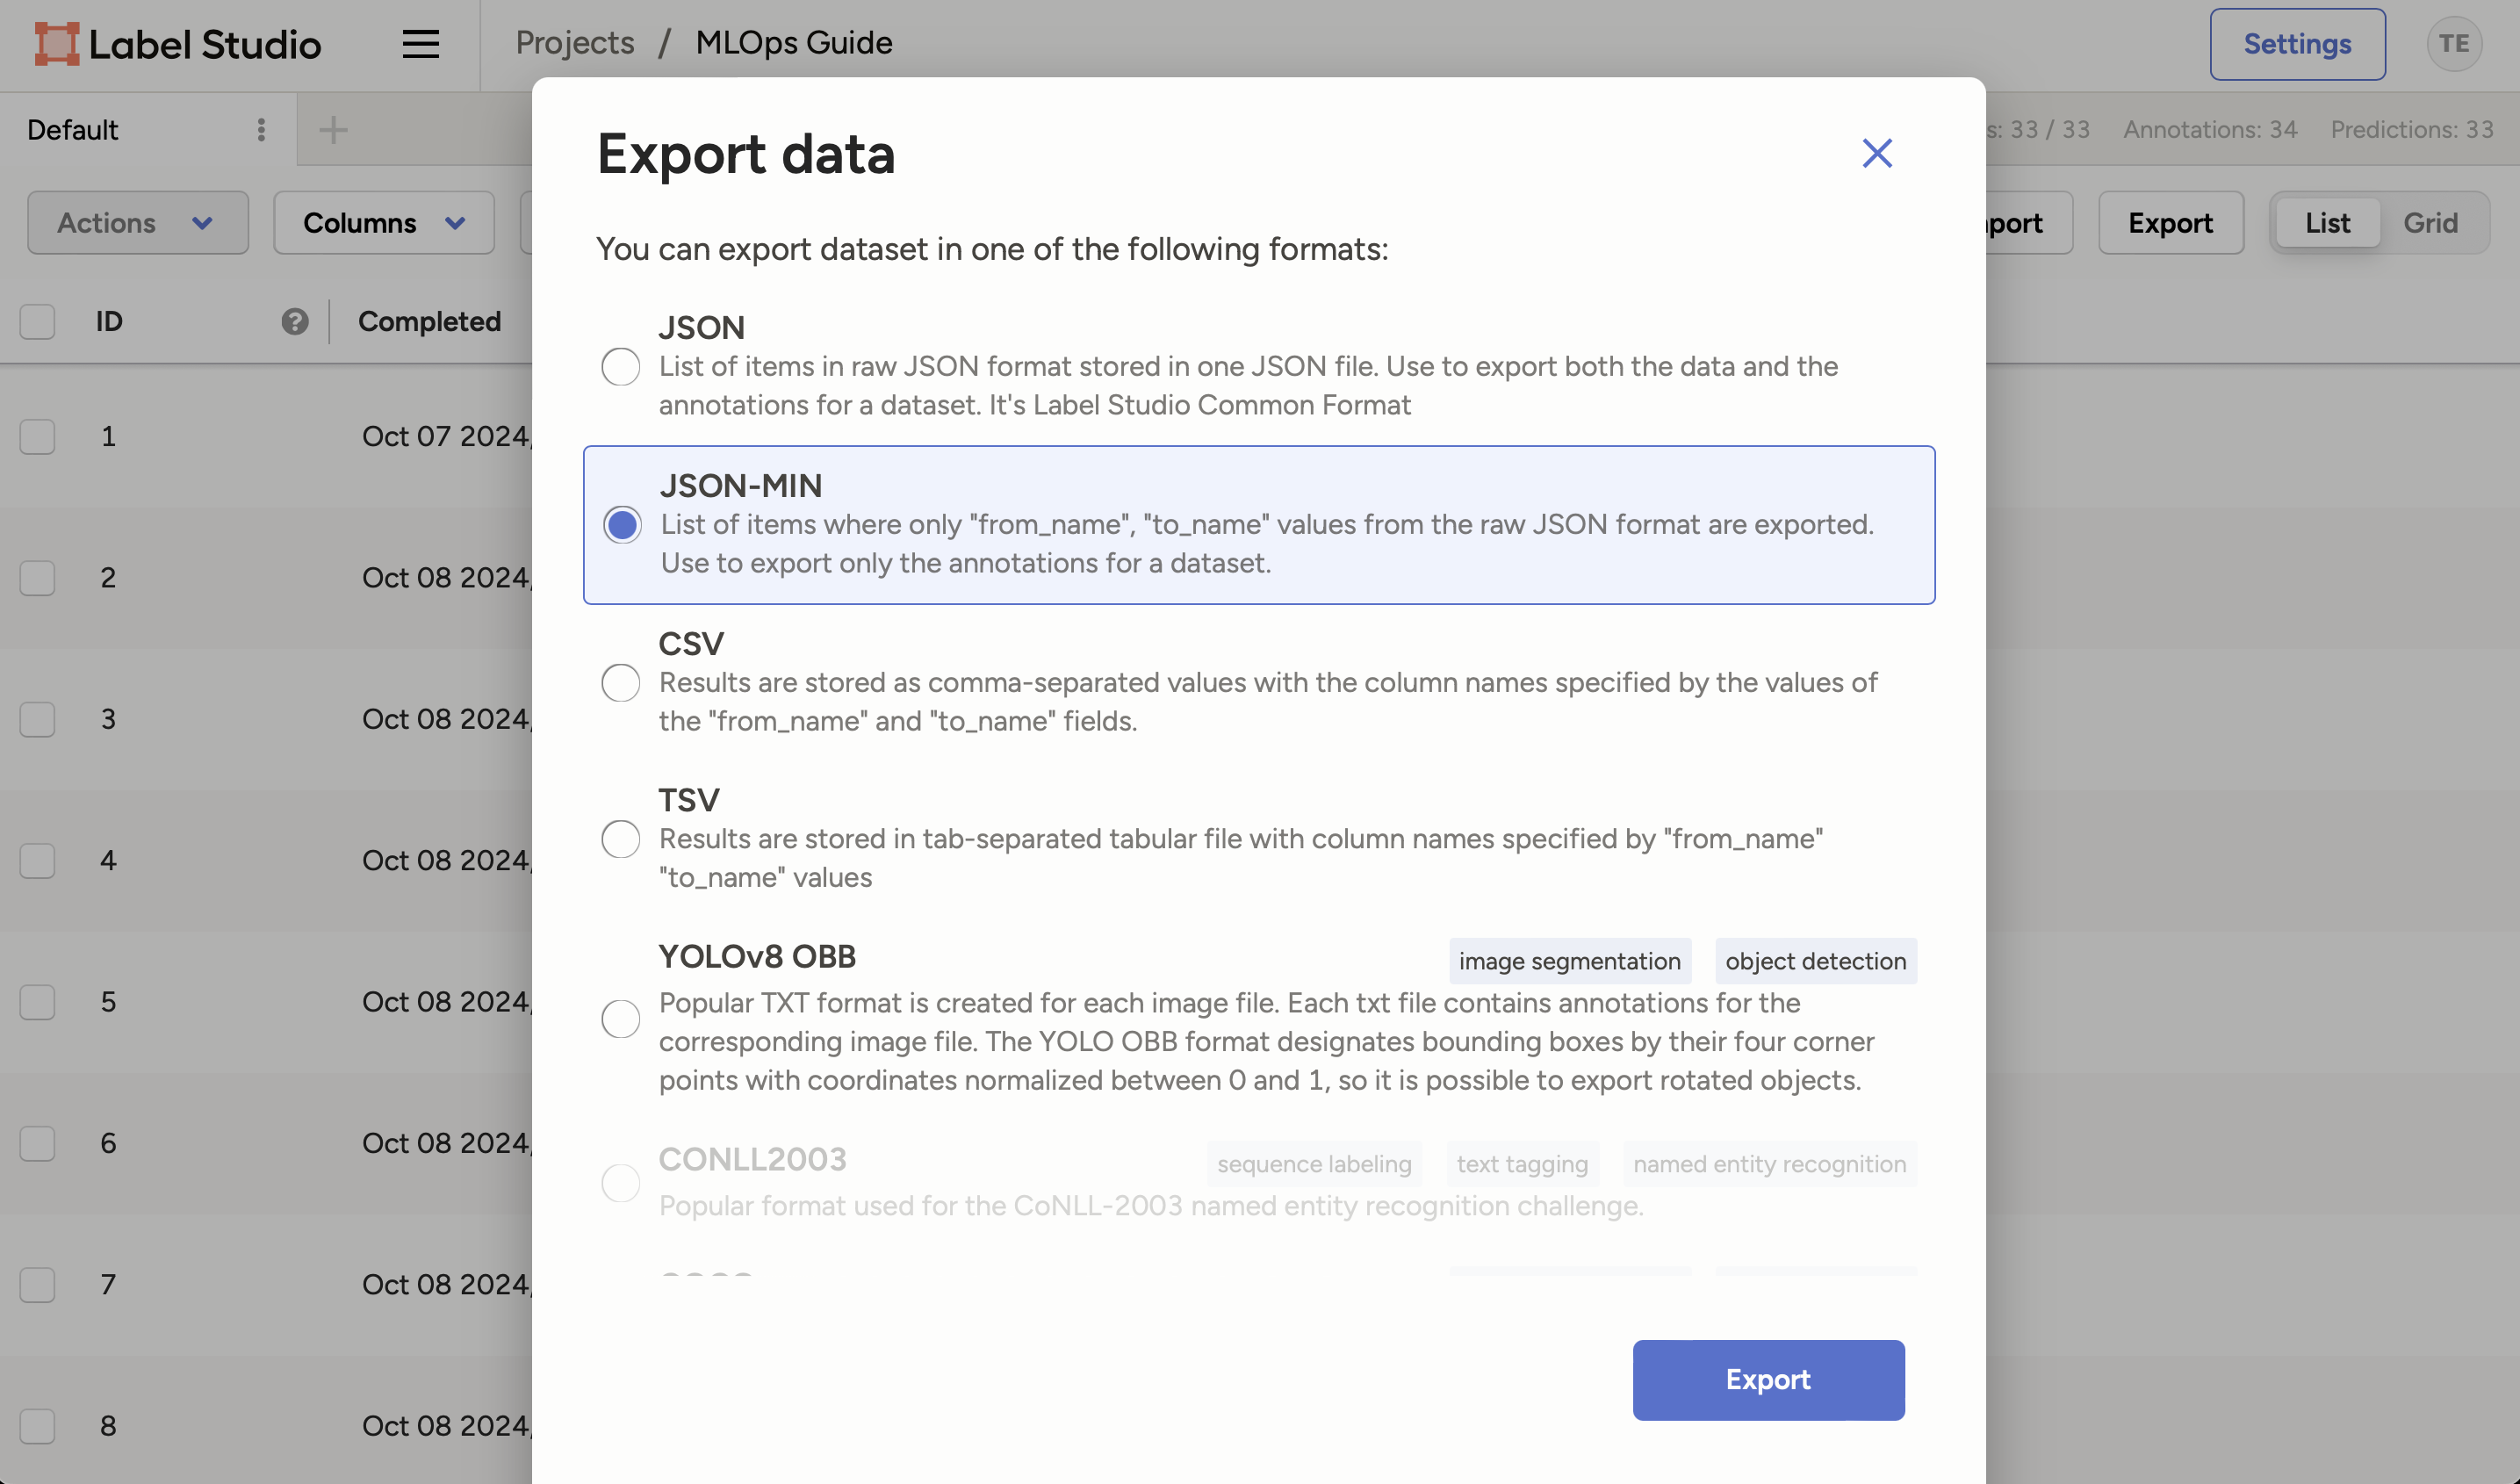
In the project view, click on the Export button and select
JSON-MINI. -
Click on the Export button to download the annotations.
-
Rename the downloaded json file to
annotations.json. -
Move the file to your
a-guide-to-mlopsrepository under theextra-data/folder.- This is the annotations file we downloaded from Label Studio.
Parse the annotations
Label Studio exports the annotations in a specific format. We need to parse these annotations to extract the labels and the corresponding data.
For this, we will use a Python script. Create a new Python script called parse_annotations.py in a new scripts/ folder of your repository.
The script reads the annotations from the annotations.json file and copies the images to the corresponding folders in the data/raw directory.
You can run the script using the following command:
| Execute the following command(s) in a terminal | |
|---|---|
The annotated images will be copied to the data/raw directory. The output should look like this:
Check the changes
Check the changes with Git to ensure that all the necessary files are tracked:
| Execute the following command(s) in a terminal | |
|---|---|
The output should look like this:
Commit the changes to Git
Commit the changes to Git:
| Execute the following command(s) in a terminal | |
|---|---|
Retrain the model
Now that we have the new data, we can retrain the model. We will use DVC:
| Execute the following command(s) in a terminal | |
|---|---|
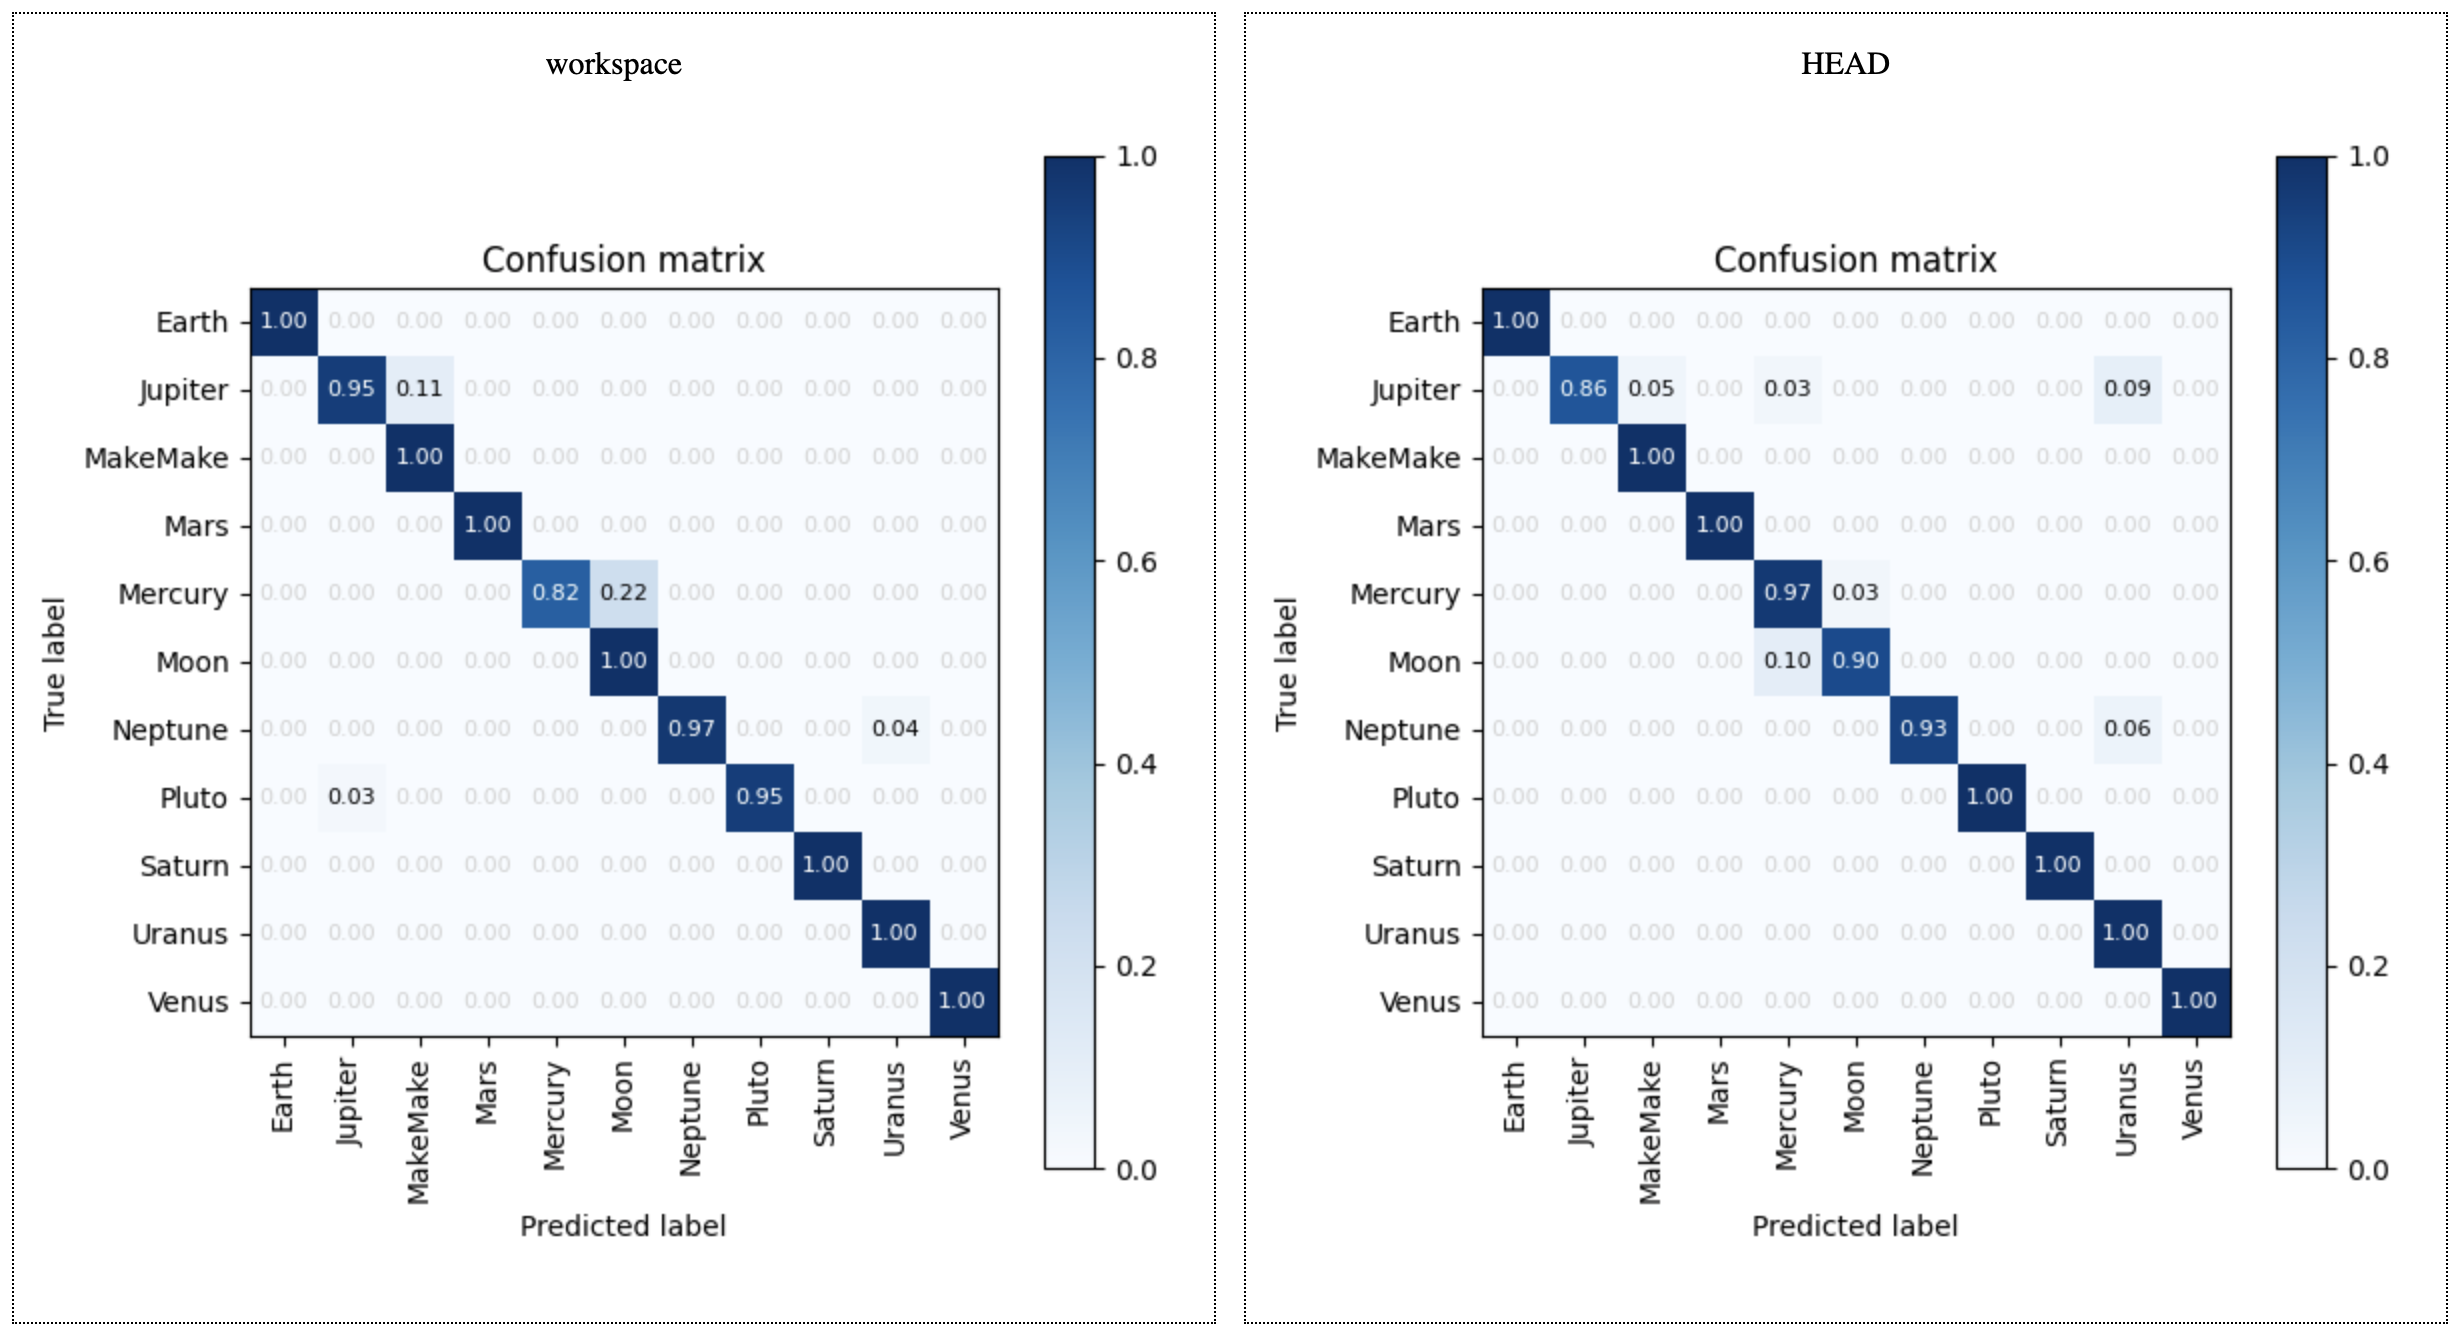
And check the new model's performance:
| Execute the following command(s) in a terminal | |
|---|---|
The plot shows the performance of the old (right) and new model (left). You can see if the new model has improved.
Commit and push the updated data
Once you want to share the new data, commit the changes and push to DVC and Git:
| Execute the following command(s) in a terminal | |
|---|---|
Summary
In this chapter, we retrained the model using the new data we labeled in Label Studio. We downloaded the annotations, parsed them, and retrained the model using DVC. We then evaluated the new model to see if it has improved.
State of the labeling process
- Labeling of supplemental data can be done systematically and uniformly
- Labeling of supplemental data is accelerated with AI assistance
- Model is retrained with the supplemental data

